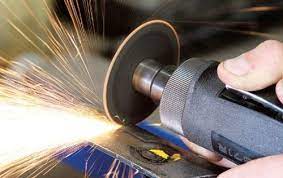
Using cutting disks safely and effectively requires proper technique and adherence to safety guidelines. Here’s a step-by-step guide on how to use cutting disks:
Safety Precautions:
Put on appropriate personal protective equipment (PPE), including safety glasses or goggles, gloves, and a dust mask.
Ensure that the work area is well-ventilated and free from flammable materials.
Read and follow the manufacturer’s instructions and safety guidelines specific to the cutting disk and power tool you are using.
Select the Right Cutting Disk:
Choose a cutting disk that is suitable for the material you intend to cut. Different cutting disks are designed for specific materials, such as metal, masonry, or plastic.
Ensure that the cutting disk is compatible with the power tool you will be using.
Prepare the Power Tool:
If using an angle grinder or rotary tool, ensure that it is in good working condition and properly maintained.
Follow the manufacturer’s instructions for mounting the cutting disk onto the power tool. Make sure it is securely attached and centered on the tool’s arbor.
Secure the Workpiece:
Place the material you want to cut on a stable work surface or secure it in a suitable vise or clamp.
Ensure that the workpiece is firmly held and will not move or shift during cutting.
Positioning and Marking:
Determine the desired cutting line on the material. Use a straightedge or marking tool to make a clear, visible line if necessary.
Position the cutting disk so that it is aligned with the cutting line and ready to make the initial cut.
Cutting Technique:
Start the power tool and allow it to reach its full speed before engaging the cutting disk with the material.
Hold the power tool with a firm grip and maintain a stable stance.
Apply light and steady pressure on the cutting disk, allowing it to do the work. Avoid excessive force or side pressure, as it can lead to binding or breakage of the disk.
Guide the cutting disk along the intended cutting line, moving it in a controlled manner. Take care to follow the line accurately and avoid veering off course.
Let the cutting disk make continuous contact with the material as you progress along the cutting line.
If cutting through thicker materials, you may need to make multiple passes, gradually deepening the cut with each pass.
Cooling and Lubrication:
Some cutting operations, particularly those involving metal, may generate heat. Consider using a coolant or lubricant specifically designed for cutting, if recommended by the manufacturer, to reduce heat and improve cutting performance. Follow the manufacturer’s instructions for their proper use.
Post-Cutting:
Once the cut is complete, release the power tool’s trigger and allow the cutting disk to come to a complete stop before setting it down.
Inspect the cut surface for smoothness and accuracy. Use a file or sandpaper, if needed, to remove any rough edges or burrs.
Clean Up:
After cutting, turn off the power tool and remove the cutting disk.
Clean up any debris or dust generated during the cutting process.
Properly store the cutting disk in a safe place, away from moisture or damage, until its next use.